Troubleshooting
Common issues with QuickBooks Desktop
Accessing logs
The connector logs can assist when diagnosing issues for QuickBooks Desktop. There are two sets that are useful in our investigations.
QuickBooks Connector Logs
The logs files created by the connector itself are located in:
C:\Program Files (x86)\<CLIENT NAME>\QuickBooks-connector\logs\connector.log
It can also be useful to get the link.json file which is located in:
C:\Program Files (x86)\<CLIENT NAME>\QuickBooks-connector\link.json
You can also check the log files location by signing in to the Codat Portal, then navigating to Monitor (1) > Health > Offline connectors (2) then selecting searching for and selecting the company. On the System Tab (3) and you will be able to see the connector location in the Computer information (3) section.
QuickBooks Logs
There are also logs created by QuickBooks itself which are located in:
C:\ProgramData\Intuit\QuickBooks\qbsdklog.txt
The connector can't be downloaded or run due to corporate policy or antivirus software
Some corporate policies or particularly stringent anti-virus software may block the connector from running. Codat actively submits the connector files with supporting information to common anti-virus packages so that it is not incorrectly marked as a potential threat.
If any of your customers have issues regarding anti-virus blocking please report these to us using your normal Codat support channel.
Syncs and write operations are still marked as queued or pending even though the connector is running
The connector's ability to access data is dependent on permissions granted by the User, normally at time of installation.

If the user has not given the connector the permission to always modify the company data file (allowing access even if QuickBooks is not running), the connector will be unable to process any queued syncs or write operations, unless the user has QuickBooks open and is logged in to the relevant company file. The connector will periodically check whether the correct file has been opened and will complete the queued/pending items as soon as possible.
The first link was successful but the company became deauthorized immediately after the datasets completed
You can configure the QuickBooks Desktop connector to run in one of two modes:
- One-time sync
- Ongoing sync
For more information about these modes, see On-premise connector setup. If one-time sync is configured, the connector will be uninstalled once the sync has completed, and the company will transition to deauthorized status.
If you'd like to enable ongoing syncs with the company, update your connector settings, and ask the SMB user to complete the linking process (i.e. downloading and installing the connector) again.
The same Company ID must be used when re-completing the linking process.
The QuickBooks Connector tray icon is red
![]()
If your QuickBooks Connector tray icon is red, this indicates that the connector application is currently not running.
To restore the connector's functionality, do the following:
-
Open the Windows Task Manager by pressing
Ctrl+Alt+Deland selecting Task Manager. -
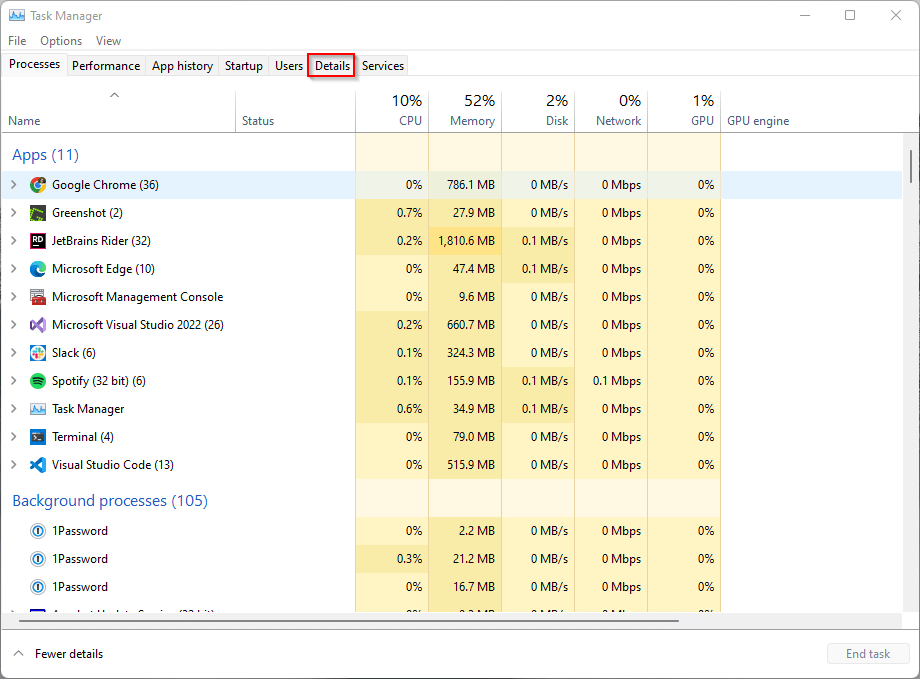
Go to the Details tab in the Task Manager.
-
Find the process named
QuickbooksDesktopUI.exe, then right-click on this item and click End Task. -
Open the Windows Task Scheduler. You can find this by opening your start menu and entering
Task Scheduler. -
Find the two tasks named
QuickbooksDesktop_{YOUR_CLIENT_NAME}andQuickbooksDesktopUi_{YOUR_CLIENT_NAME}. The two processes shown below are from our internal development build; your client name would replace "Codat Engineering - Integration".
-
Right-click and select Run on the two tasks in the following order:
QuickbooksDesktop_{YOUR_CLIENT_NAME}QuickbooksDesktopUi_{YOUR_CLIENT_NAME}
The tray icon should no longer be red, which indicates a healthy connection. If the tray icon does not reappear or is still red, you can try restarting your machine.

If the tray icon remains red after a restart, contact our Support Team.
Reinstalling the Application Certificate
In Order for the connector to link to the QuickBooks desktop datafile, the user needs to have accepted a QuickBooks Application Certificate.
Typically this will pop up as a prompt the first time the user downloads the connector and looks like this -
The user must select "Yes, always; allow access even if QuickBooks is not running", as this will allow the Connector to communicate with the QuickBooks file even when the users QuickBooks session is not active.
To get back to the certificate settings within QuickBooks go to:
Edit > Preferences > Integrated Applications > Company Preferences
You will then need to select the application named 'QuickBooks Connector' and click remove.
Once you have removed the certificate, you can then re-run the installation process for the connector - either by running the downloaded (this might be in the downloads folder and might be named YOUR_COMPANY-quickbooksdesktop-connector) or alternatively by re-visiting the connector download page. During the installation process you will then receive a prompt asking for permission from the application certificate.
Whitelisting
Webroot SecureAnywhere desktop app
Some companies using our offline connectors and Webroot SecureAnywhere anti-virus have reported experiencing difficulties when trying to sync data.
We have identified that Webroot SecureAnywhere sometimes blocks updates to the QuickBooks desktop connector as it is incorrectly identifying connectors as a possible threat.
We recommend white-listing the folder where the connector has been installed to prevent Webroot SecureAnywhere blocking the connector from running after an update.
To white-list the connector folder, your users should:
Open their Webroot SecureAnywhere Desktop app and click on Settings icon in the PC Security section. Navigate to the 'Whitelisted Scripts' tab and click on Advanced Whitelist Using the tree hierarchy, select the folder in which the connector has been installed (C:\Users\YOUR_USERNAME\AppData\Local\Codat) and click Select.
*Note: We recommend that the user selects the whole folder and not just individual connector locations. *
Double-check that the folder where the connector is located is displayed in the list and close the Webroot SecureAnywhere desktop app.