Set up the demo app
Prepare your Codat instance and local environment to run the demo app
🚀 In this section, you will...
- Create your Codat account
- Enable the Lending solution
- Configure webhooksWebhook An automated notification sent from Codat to your application when specific events occur, such as when data syncs complete or connections change status.
- Set up your local environment
- Run the demo app
Log into your Codat account
Log into your Codat Test account. When you start working on your own loan qualification solution, you may want to contact our Sales team to implement it in Production.
Enable the Lending product
In the Settings > Organization settings > Products section of the Codat Portal, find Lending in the list of products and enable it. This also enables the data types required by this solution. For example, balanceSheet and profitandLoss, which are used by the demo app, will be enabled.
We use Lending's categorization feature. It allows you to perform automated decisioning based on the categorized accounts.
Update your auth flow settings
In the Settings > Auth Flow > LinkLink The authorization flow that allows end users to connect their accounting, banking, or commerce platforms to your application via Codat. settings, ensure the Sandbox integrations switch is toggled on. Check that the Accounting integration category is enabled, and disable Commerce and Banking integration categories.
Listen for webhooksWebhook An automated notification sent from Codat to your application when specific events occur, such as when data syncs complete or connections change status.
The app will use several webhooksWebhook An automated notification sent from Codat to your application when specific events occur, such as when data syncs complete or connections change status. to track the completion of the financial data syncSync The process of fetching the latest data from a connected data source. Syncs can be triggered manually or run automatically on a schedule. and the categorization of accounts, and Sandbox linking completion.
We will use ngrok here to listen for Codat's webhooksWebhook An automated notification sent from Codat to your application when specific events occur, such as when data syncs complete or connections change status..
- Windows OS
- Mac OS
In Windows PowerShell, run the following commands:
choco install ngrok
ngrok http 5069
This will install ngrok using Chocolatey and run it at port 5069.
Copy the forwarding address - this will be the <server-url> for the webhooksWebhook An automated notification sent from Codat to your application when specific events occur, such as when data syncs complete or connections change status..
In the terminal, run the following commands:
brew install ngrok
ngrok http 5069
This will install ngrok using Homebrew and run it at port 5069.
Copy the forwarding address - this will be the <server-url> for the webhooksWebhook An automated notification sent from Codat to your application when specific events occur, such as when data syncs complete or connections change status..
Configure Codat webhooksWebhook An automated notification sent from Codat to your application when specific events occur, such as when data syncs complete or connections change status.
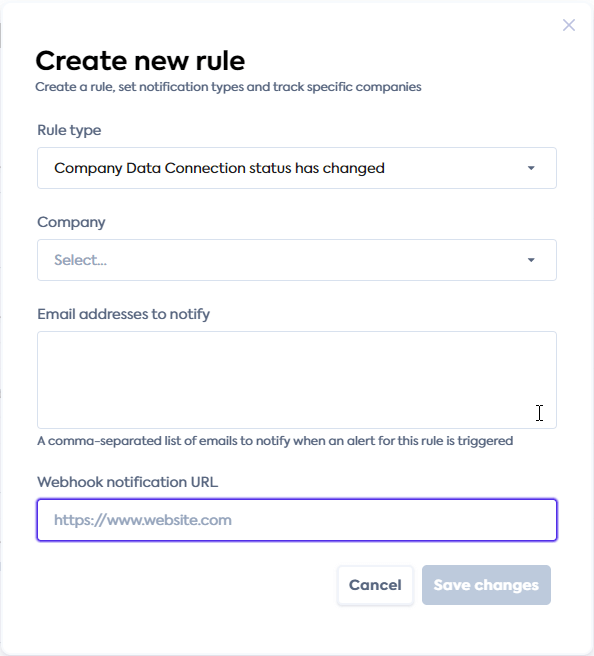
In the Settings > WebhooksWebhook An automated notification sent from Codat to your application when specific events occur, such as when data syncs complete or connections change status. > Rules section of the Codat Portal, create three rules, one for each webhookWebhook An automated notification sent from Codat to your application when specific events occur, such as when data syncs complete or connections change status. we will use:
| Rule type | WebhookWebhook An automated notification sent from Codat to your application when specific events occur, such as when data syncs complete or connections change status. notification URL |
|---|---|
| CompanyCompany In Codat, a company represents your customer's business entity. Companies can have multiple connections to different data sources. Data ConnectionConnection A link between a Codat company and a data source (like an accounting platform). Each connection represents authorized access to pull or push data from that platform. status has changed | <server-url>/webhooks/codat/data-connection-status |
| Data syncSync The process of fetching the latest data from a connected data source. Syncs can be triggered manually or run automatically on a schedule. completed | <server-url>/webhooks/codat/datatype-sync-complete |
| Account categories updated | <server-url>/webhooks/codat/account-categorisation-update |
Click Create rule to open the new rule creation window. Select the rule type, apply it to all companies, and assign it a webhookWebhook An automated notification sent from Codat to your application when specific events occur, such as when data syncs complete or connections change status. URL. Make sure to replace the <server-url> with your forwarding address.
Clone the code
Clone our demo repo on GitHub to download the loan qualification demo app.
The main file directory for the demo app is Codat.Demos.Underwriting.Api. Key logic components of the app are located in Controllers, Orchestrator, and Services folders.
Note that the other directory in the repository, Codat.Demos.Underwriting.Api.Tests, contains a series of unit and integration tests for the demo app and is not needed for you to run the demo project.
   ├──BindingModule.cs
   ├──Codat.Demos.Underwriting.Api.csproj
   ├──Program.cs
   ├──appsettings.Development.json
   ├──appsettings.json // Add your API key in this file
   |
   ├──Controllers // Controllers for the API endpoints to manage expected actions and results
   |    ├──UnderwritingController.cs // Front-end endpoint controller
   |    └──WebhooksController.cs     // Back-end endpoint controller
   |
   ├──Exceptions // Definitions for managing error events
   |    ├──...
   |
   ├──Extensions // Used to extend classes in C#
   |    └──CollectionExtensions.cs
   |
   ├──Models // Represent the schemas used in this solution
   |    ├──...
   |
   ├──Orchestrators // Manages the six methods that relate to endpoints used in the app
   |    └──ApplicationOrchestrator.cs
   |
   ├──Properties // Setup for http, https, and IIS Express profiles
   |    └──launchSettings.json
   |
   └──Services // Key application components that perform specified tasks
      ├──ApplicationStore.cs // Handles creating and storing the loan application in-memory
      └──LoanUnderwriter.cs  // Decision process method for the underwriting model used in the demo
Set your APIAPI A set of rules and protocols that allows different software applications to communicate with each other. Codat provides APIs for accessing financial data from accounting, banking, and commerce platforms. key
In the Developers section of the Codat Portal, copy your APIAPI A set of rules and protocols that allows different software applications to communicate with each other. Codat provides APIs for accessing financial data from accounting, banking, and commerce platforms. key from the APIAPI A set of rules and protocols that allows different software applications to communicate with each other. Codat provides APIs for accessing financial data from accounting, banking, and commerce platforms. key column (not the auth header). You can click Create another APIAPI A set of rules and protocols that allows different software applications to communicate with each other. Codat provides APIs for accessing financial data from accounting, banking, and commerce platforms. key if one wasn't automatically generated for you. In the Codat.Demos.Underwriting.Api\ directory, edit the appsettings.json file and enter the APIAPI A set of rules and protocols that allows different software applications to communicate with each other. Codat provides APIs for accessing financial data from accounting, banking, and commerce platforms. key you just copied as the CodatApiKey.
Run the app
- Command line
- Rider
- Visual studio
Run the following command in the root directory Codat.Demos.Underwriting.Api:
dotnet run --launch-profile http
Once running, open the Swagger page in your web browser: http://localhost:5069/swagger/index.html You will use it to call the demo's endpoints.
Make sure the http profile is set and press "Run". The IDE will automatically open Swagger in a new tab of your browser. You will use it to call the demo's endpoints.
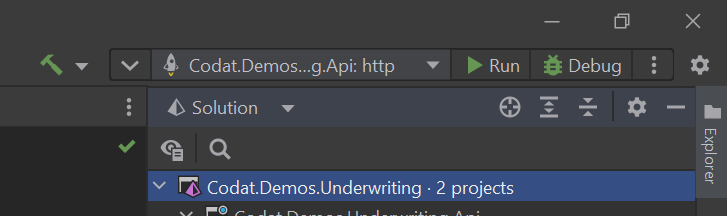
Ensure the http profile is set and press the "Play" icon. The IDE will automatically open Swagger in a new tab of your browser. You will use it to call the demo's endpoints.

Recap
You have now set up your Codat instance and your local environment in preparation for running the app. You have also cloned the repository and started running the app.