Create and connect a customer
Learn how to onboard and manage companies that represent your customers
Our Codat Portal is your one-stop shop to view the customers and relationships you are responsible for. Here, your organization's clients are represented as companies.
In this guide, we will cover the ways you can create new customers, manage existing ones, and request financial data from them.
Create customer
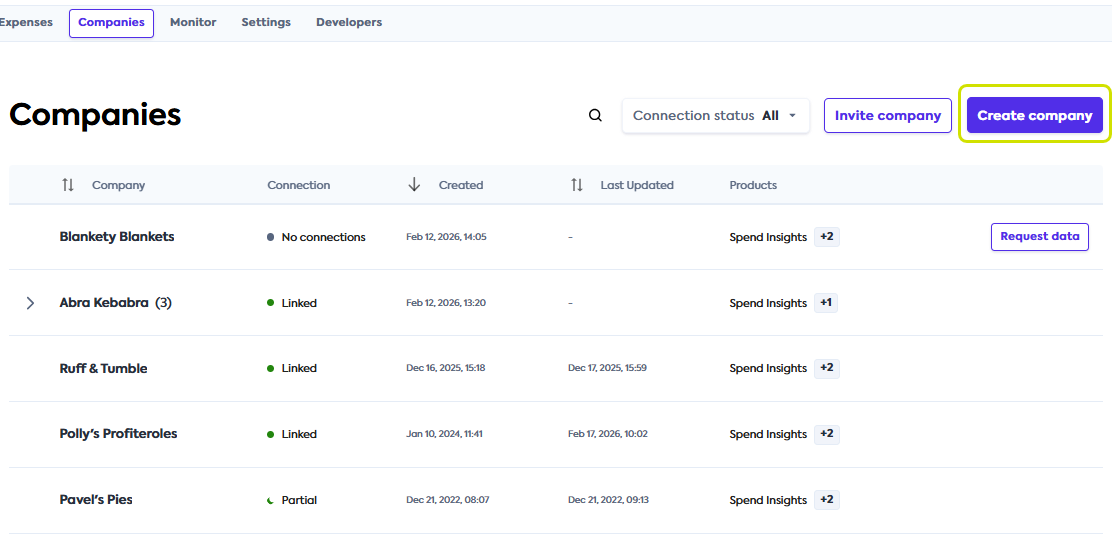
Navigate to the Companies tab in the Codat Portal to start the creation of a new companyCompany In Codat, a company represents your customer's business entity. Companies can have multiple connections to different data sources. that represents your customer.
-
Click the Create companyCompany In Codat, a company represents your customer's business entity. Companies can have multiple connections to different data sources. button. This will open a Create a companyCompany In Codat, a company represents your customer's business entity. Companies can have multiple connections to different data sources. window.
-
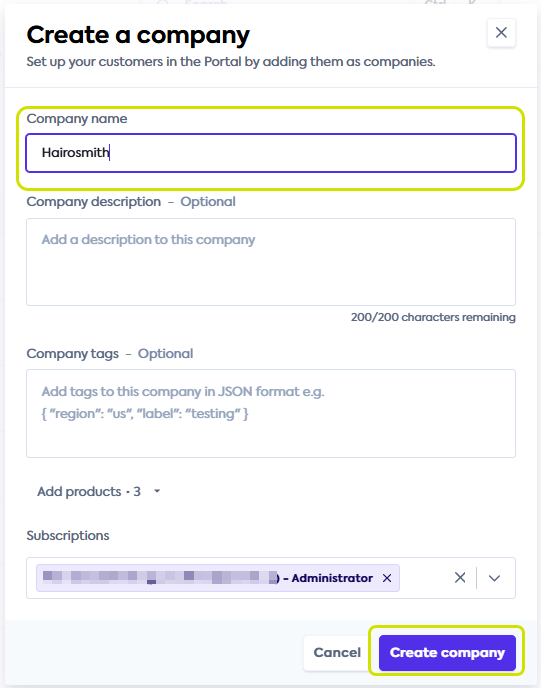
In the Create a companyCompany In Codat, a company represents your customer's business entity. Companies can have multiple connections to different data sources. window, enter your customer's companyCompany In Codat, a company represents your customer's business entity. Companies can have multiple connections to different data sources. name in the CompanyCompany In Codat, a company represents your customer's business entity. Companies can have multiple connections to different data sources. name field. You can add an optional description in the Description field and disregard CompanyCompany In Codat, a company represents your customer's business entity. Companies can have multiple connections to different data sources. tags.
Extra fieldsYou may see the Add products dropdown when creating a companyCompany In Codat, a company represents your customer's business entity. Companies can have multiple connections to different data sources. from the Companies tab. Select Spend Insights and continue with companyCompany In Codat, a company represents your customer's business entity. Companies can have multiple connections to different data sources. creation.
You may also see the Subscriptions email selection dropdown. It's used by our Ongoing Insights report. See Ongoing Insights report reference and reach out to your account manager to enable it.
-
Click Create companyCompany In Codat, a company represents your customer's business entity. Companies can have multiple connections to different data sources. to finish creating your customer in Codat.
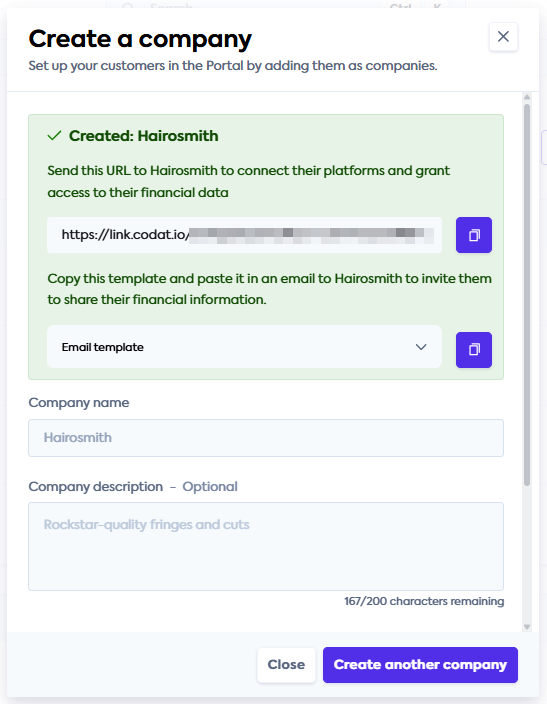
You have successfully created your customer as a companyCompany In Codat, a company represents your customer's business entity. Companies can have multiple connections to different data sources. in Codat. Next, you can:
- Click Create another companyCompany In Codat, a company represents your customer's business entity. Companies can have multiple connections to different data sources. to add more customers to Codat.
- Use the LinkLink The authorization flow that allows end users to connect their accounting, banking, or commerce platforms to your application via Codat. URL or Email template to onboard your customer. We explain these options in more detail in our Onboard customer section.
- Manage the details of the customers you created.
- Close the Create a companyCompany In Codat, a company represents your customer's business entity. Companies can have multiple connections to different data sources. window and navigate to the Spend Insights tab.
Onboard customer
You can initiate requests for your customers' accounts payable information in several ways:
- Using the Request data button on the Spend Insights tab.
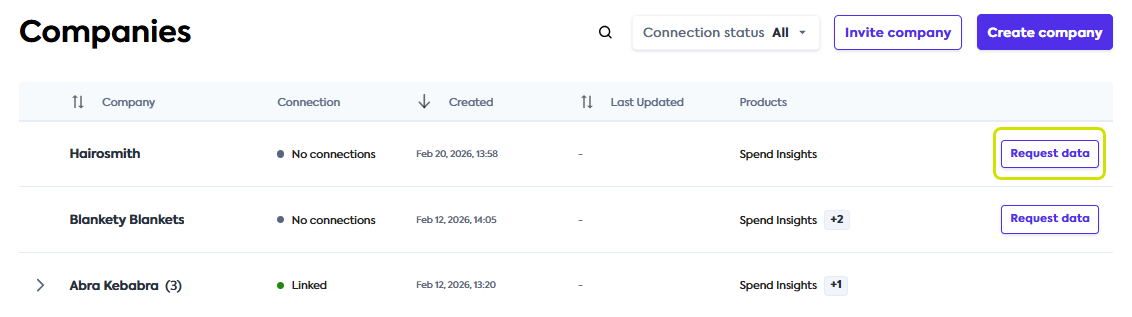
- Using the Request data button on the Companies tab.
The steps to request this information are the same across these options:
-
Click the Request data button next to the relevant customer's name to open the Onboarding window.
-
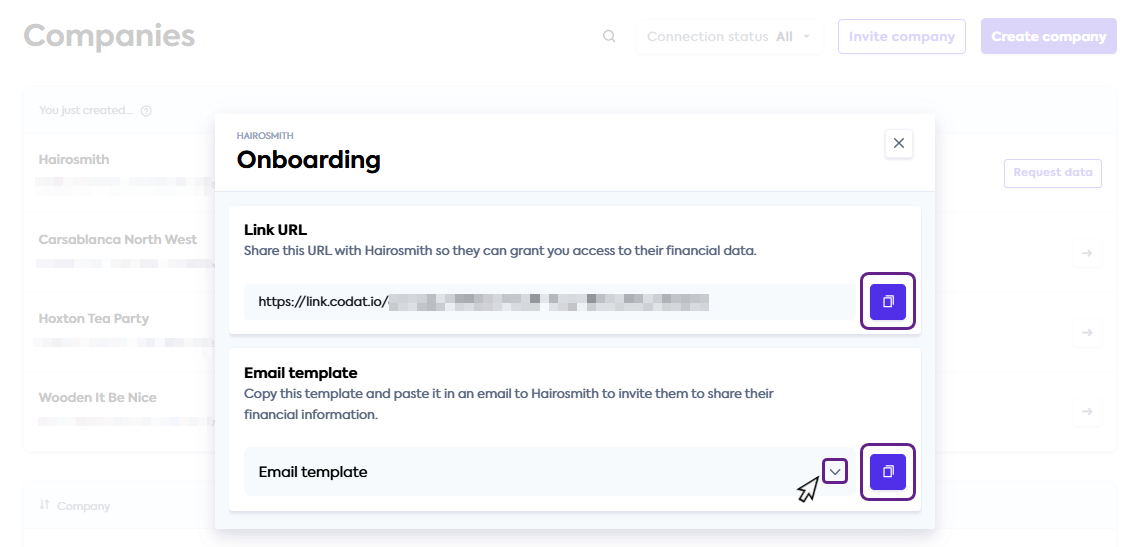
In the Onboarding window, choose how you want to ask your customer for their data:
- Copy the LinkLink The authorization flow that allows end users to connect their accounting, banking, or commerce platforms to your application via Codat. URL if you want to send a direct connectionConnection A link between a Codat company and a data source (like an accounting platform). Each connection represents authorized access to pull or push data from that platform. linkLink The authorization flow that allows end users to connect their accounting, banking, or commerce platforms to your application via Codat. to your customer or use the linkLink The authorization flow that allows end users to connect their accounting, banking, or commerce platforms to your application via Codat. in your own communication.
- Copy the Email template if you would like support in providing additional context to your customer. You can view the template by clicking the dropdown icon.
 Request data when creating customer
You will see the LinkLink The authorization flow that allows end users to connect their accounting, banking, or commerce platforms to your application via Codat. URL and Email template when you first create your customer in Codat.
Based on your organization's business processes, you can request data immediately after creating the customer or do it later following this process.
-
Following your organization's ways of working, share the LinkLink The authorization flow that allows end users to connect their accounting, banking, or commerce platforms to your application via Codat. URL or the email content with your customer. You can also proactively share answers to common questions with them.
You have requested supplier and spend information from your customer. Next, your customer needs to complete a connectionConnection A link between a Codat company and a data source (like an accounting platform). Each connection represents authorized access to pull or push data from that platform. journey to provide it to your organization. Based on the software they use, they can authorize a digital connectionConnection A link between a Codat company and a data source (like an accounting platform). Each connection represents authorized access to pull or push data from that platform. or upload files with supplier and bill data.
You can support your customer on this journey using the following guides:
- Data streaming: Help your customer establish an ongoing connectionConnection A link between a Codat company and a data source (like an accounting platform). Each connection represents authorized access to pull or push data from that platform. with their accounting software.
- Intelligent file upload: Direct your customer through sharing files that contain their financial information.
Manage customers
View customers
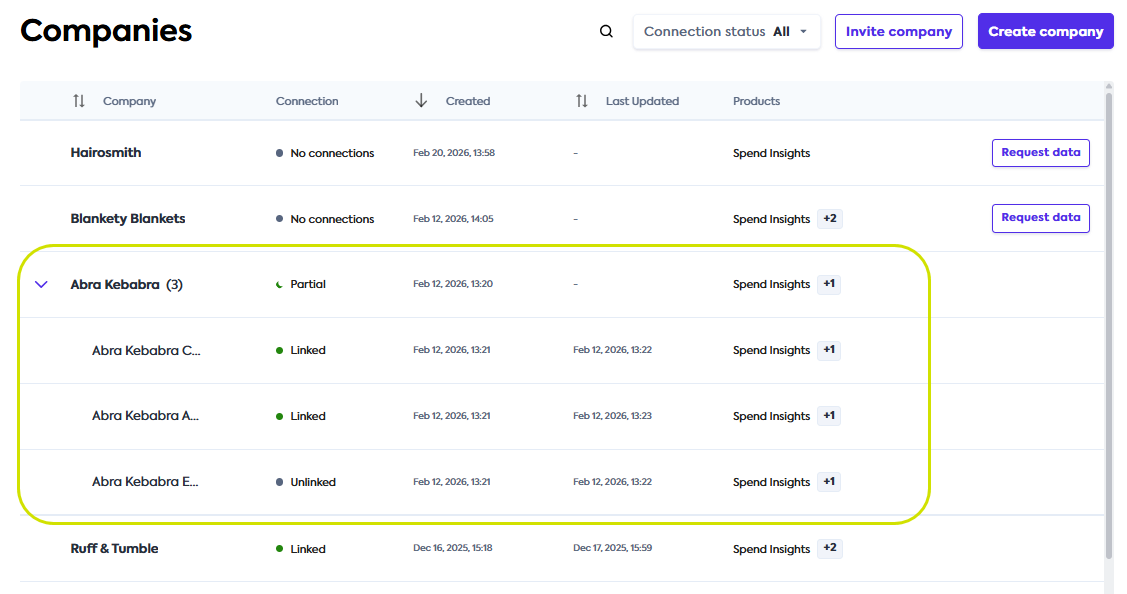
You can view all existing customers in the Spend Insights tab or the Companies tab. If your customer's companyCompany In Codat, a company represents your customer's business entity. Companies can have multiple connections to different data sources. has multiple subsidiaries, you can expand the parent companyCompany In Codat, a company represents your customer's business entity. Companies can have multiple connections to different data sources. to view its children by clicking on the arrow next to companyCompany In Codat, a company represents your customer's business entity. Companies can have multiple connections to different data sources. name. You can also open the parent companyCompany In Codat, a company represents your customer's business entity. Companies can have multiple connections to different data sources. and select Subsidiaries in the sidebar to manage its child companies with the full Companies-table controls.
Edit and delete customers
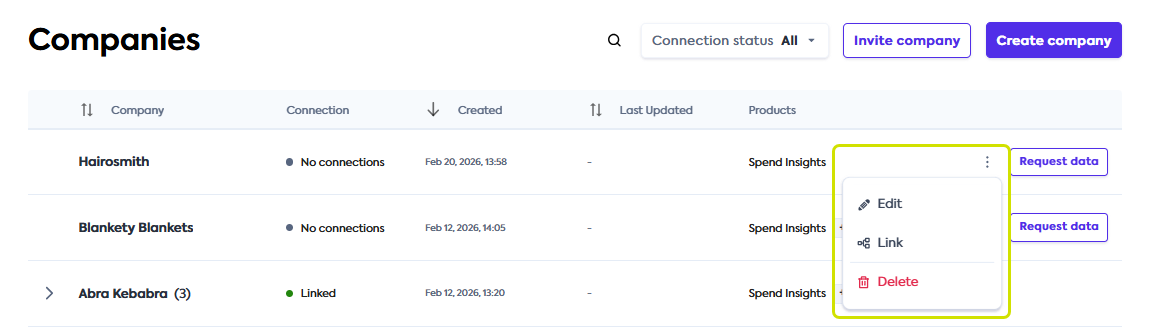
To edit or delete your existing customers, navigate to the Companies tab. Click on the triple-dot menu to view the editing options dropdown.
From there, you can click Edit to change companyCompany In Codat, a company represents your customer's business entity. Companies can have multiple connections to different data sources. details or Delete to delete it. To view the companyCompany In Codat, a company represents your customer's business entity. Companies can have multiple connections to different data sources.'s LinkLink The authorization flow that allows end users to connect their accounting, banking, or commerce platforms to your application via Codat. URL, email template, and existing connectionsConnection A link between a Codat company and a data source (like an accounting platform). Each connection represents authorized access to pull or push data from that platform., click LinkLink The authorization flow that allows end users to connect their accounting, banking, or commerce platforms to your application via Codat. in the same dropdown.
If you delete a companyCompany In Codat, a company represents your customer's business entity. Companies can have multiple connections to different data sources., this will also delete the data you previously received from it. As a result, you won't be able to access this companyCompany In Codat, a company represents your customer's business entity. Companies can have multiple connections to different data sources.'s reports in the Portal. This operation is not reversible.
If the companyCompany In Codat, a company represents your customer's business entity. Companies can have multiple connections to different data sources. you are deleting is a parent companyCompany In Codat, a company represents your customer's business entity. Companies can have multiple connections to different data sources., this will also delete its subsidiaries. You will be asked to confirm this operation.
Once your customer shares their financial information with you, you can get Spend Insights reports Codat prepared based on this data.