Implementing an account mapping user interface
Tips and advice on managing inconsistent accounts across your user base
Accounting software that your customers use normally offer them a default set of accounts (also known as chart of accounts), pre-defined to match accounting best practices. Your customers then have the ability to rename and renumber these accounts, or create new ones, to match their business needs.
This results in discrepancies of the accounts list across your customer base. To manage that and use accounts specific to your customers, provide your customers with an account mapping user interface.
An account mapping page is particularly helpful if you are:
- Creating or updating data with our Accounting APIAPI A set of rules and protocols that allows different software applications to communicate with each other. Codat provides APIs for accessing financial data from accounting, banking, and commerce platforms..
- Creating a solution for Bill pay, Payroll, Expense management or Payments use cases.
- Implementing lending writeback in your Xero integration.
Implementation guidance
First, obtain front-end support to create the account mapping page and include it in your customer onboarding. When the initial accounting data syncSync The process of fetching the latest data from a connected data source. Syncs can be triggered manually or run automatically on a schedule. is complete, present the suggested mapping to your customers and ask them to review it and change it where appropriate or perform the mapping themselves.
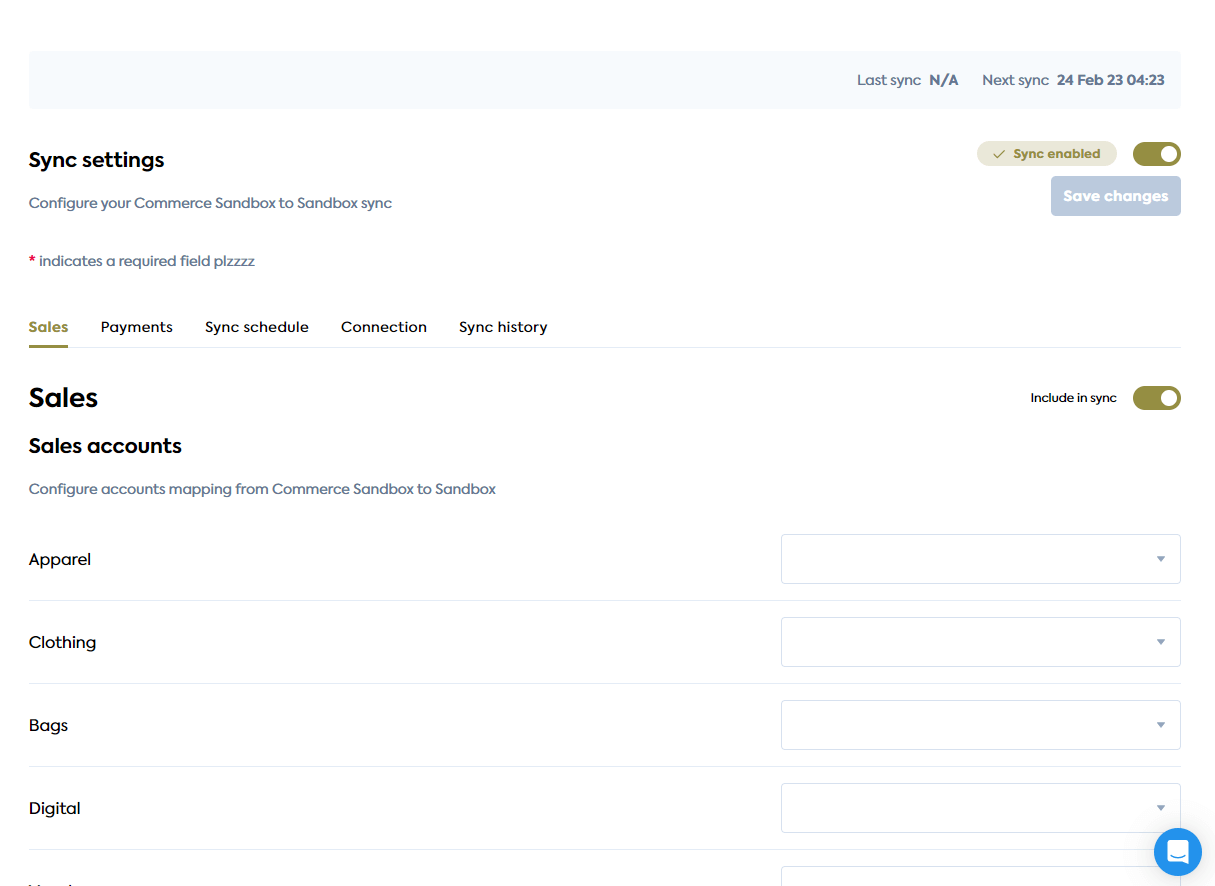
Here is a simple example of an account mapping user interface implemented using dropdowns.
Using the APIAPI A set of rules and protocols that allows different software applications to communicate with each other. Codat provides APIs for accessing financial data from accounting, banking, and commerce platforms. for mapping
Build your account mapping process to use the Codat APIAPI A set of rules and protocols that allows different software applications to communicate with each other. Codat provides APIs for accessing financial data from accounting, banking, and commerce platforms. as follows:
-
Enable the Chart of Accounts data type and set it to fetch on first linkLink The authorization flow that allows end users to connect their accounting, banking, or commerce platforms to your application via Codat.. Navigate to Settings > Integrations > Data types to manage Data type settings in the Portal or use the API instead.
You can also read more about data type settings.
-
Configure a webhook consumer to listen for the DatasetDataChanged event that indicates changes in the underlying data for the
chartOfAccountsdata type. You will receive a notification when the data syncSync The process of fetching the latest data from a connected data source. Syncs can be triggered manually or run automatically on a schedule. completes successfully. -
Once notified by the webhookWebhook An automated notification sent from Codat to your application when specific events occur, such as when data syncs complete or connections change status., call our List accounts endpoint and use the response to display
account.nameandaccount.idin a dropdown box for your customer to choose the correct mapping. You can also query the response to simplify the mapping experience for your customer:- Display only active accounts of relevant account type needed for your mapping page, such as
type=incomeandstatus=active.
/companies/{{companyId}}/data/accounts?query=status%3dactive&&type%3dincome- Set defaults for customers. For example, if you are mapping sales revenue, check if a “Sales” account exists and present it as a suggestion.
/companies/{{companyId}}/data/accounts?query=name~sales- If creating or updating invoices or payments in Xero, allow your customer only to select a bank account that has the 'Enable payments to account' checkbox ticked.
/companies/{{companyId}}/data/accounts?query=isBankAccount%3dtrue - Display only active accounts of relevant account type needed for your mapping page, such as
If a new account is required for correct mapping, you can offer your customer to create one. You will need a user interface that supports additional steps, such as populating fields required for account creation by the specific accounting software.
Read our guidance on writing data with Codat.
Mapping validation
Once the initial mapping is complete, you need to validate account mappings periodically because customers may continue changing their list of accounts after they have set up your integration.
We recommend validating the mapping prior to performing any create or update operation. Use the DatasetDataChanged webhookWebhook An automated notification sent from Codat to your application when specific events occur, such as when data syncs complete or connections change status. consumer you previously set up that informs you of changes in the chartOfAccounts data type.
If new accounts are present that have not been mapped yet, notify your customer and guide them back to the mapping page.